
In this tutorial, we will learn how to make “G Major 16” in Vegas Application.
Step 1: Open Vegas application, then import your video.
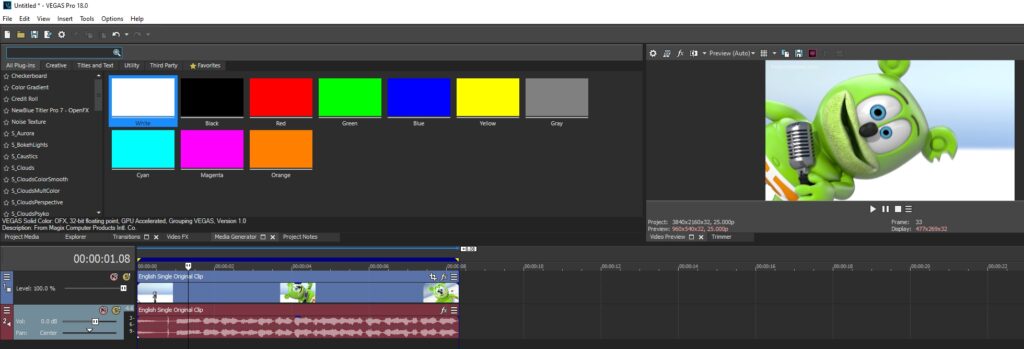
Step 2: Go to video section and click fx symbol. As an alternate way, you can just right click the video and choose Media fx.
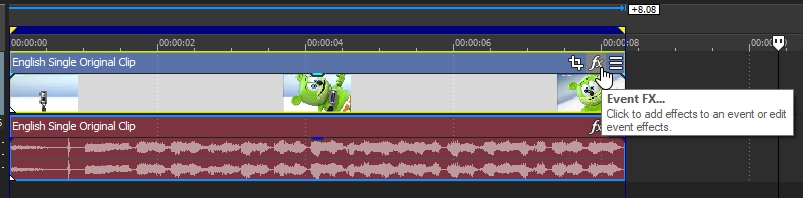
Step 3: Choose HSL Adjust in the list of effects.

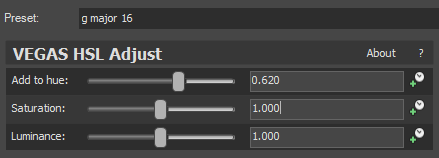
Step 4: In the window for HSL Adjust, set Hue to 0.620
Hue -> 0.620
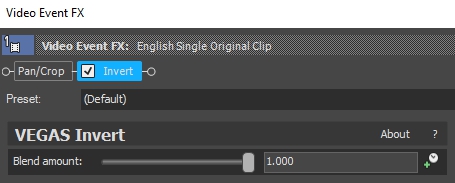
Step 5: Add the 2nd effect Invert.
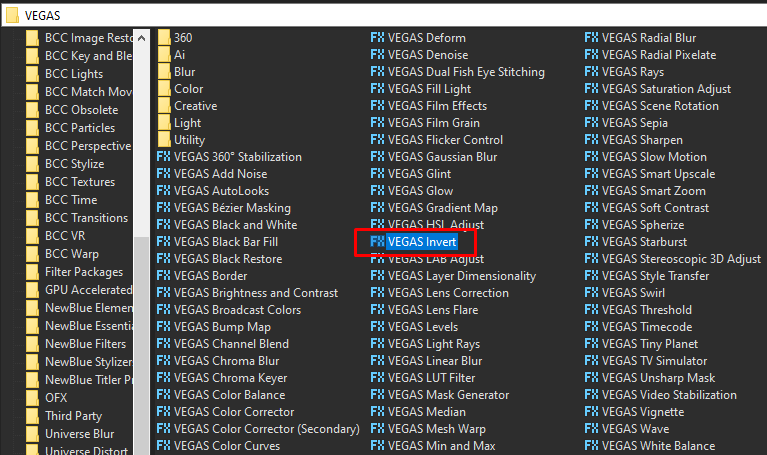
Step 6: In the list of Presets for Invert, choose Default.
Blend Amount: 1.000
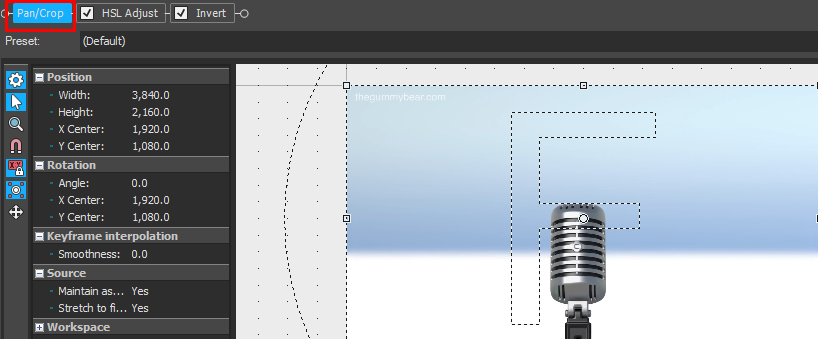
Step 7: And lastly, flip your video horizontally. Go to Pan/Crop which you can see as the default and 1st effect in your Video Event FX.
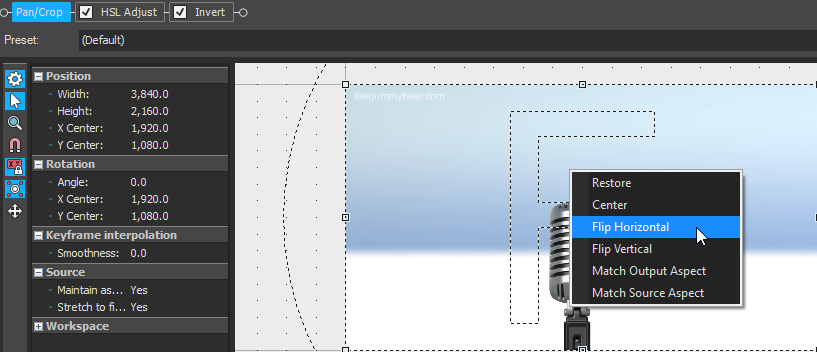
Step 8: Right click anywhere in the video preview, and choose Flip Horizontal.
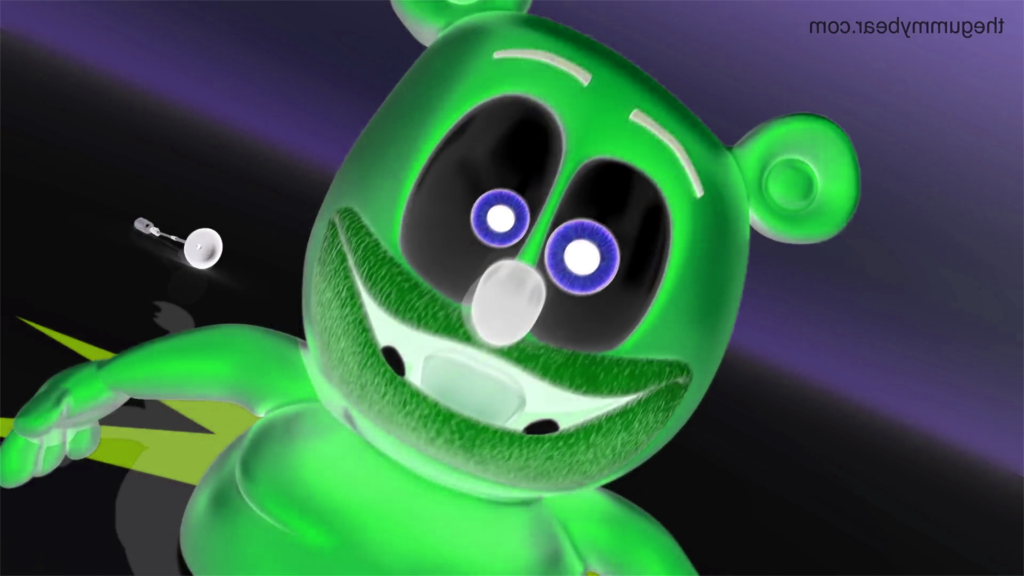
That’s it for the video effect, if you are using Gummy Bear as reference, it should look like this
Step 9:
For the audio part, right click audio, then choose Properties.
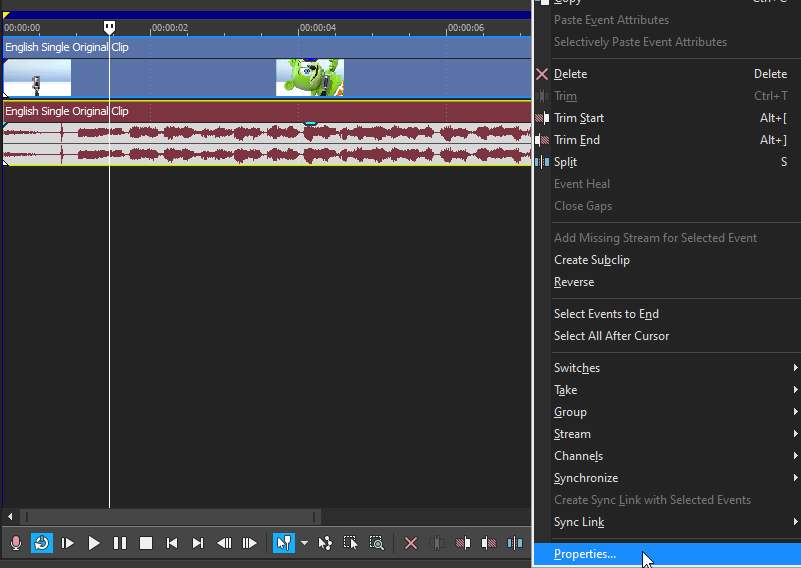
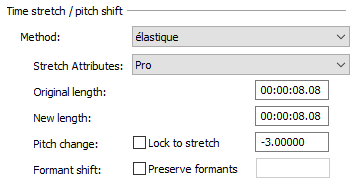
Step 10: In the popup window, change the following:
Method: elastique
Stretch Attributes: Pro
Pitch Change: -3.000
Step 11: Go to your audio again and right click it, then choose Duplicate track

Step 12: Change the pitch of the new audio with the following:
Method: elastique
Stretch Attributes: Pro
Pitch Change: 0.000
Step 13: Render the video, you have successfully made the G Major 16 Effect.
Here are my videos with G Major 16 effect.
If you find this tutorial very helpful, please feel free to share it.
You can also find me in Youtube -> Team Bahay